Learn ESP32 with ESP32 PLUS Development Board
WHAT IS the ESP32?
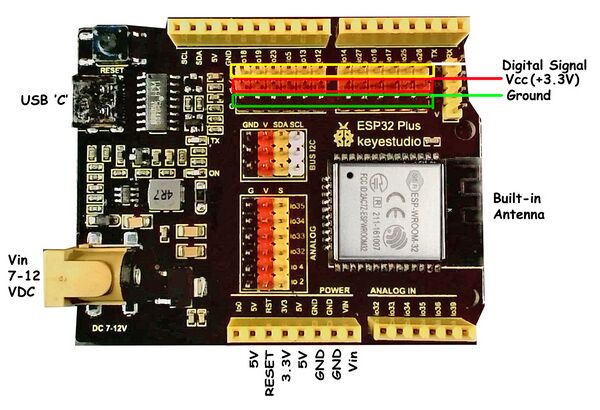
ESP32 is a series of low-cost, low-power system-on-a-chip micro-controllers designed by Espressif in Shanghai, China. It has integrated Wi-Fi and dual-mode Bluetooth radios. It has many of the capabilities of the Arduino and can be programmed with the Arduino IDE software and so is an easy upgrade path to wireless communications for Arduino users. The photo on the left shows the ESP32 (silver square) mounted on an Arduino-like board. This is the ESP32 PLUS Development Board which we will use to learn ESP32 .
The ESP32 supports many peripherals such as: capacitive touch, ADC, DAC, I2C, SPI, UART, I2S, PWM. It is appropriate for Internet of Things Projects using WiFi and enables Bluetooth communications for Smartphone applications.
INTRO
The objective of this course (and hardware kit) is to provide students with the courseware, hardware and software to deeply engage with Electronics, Microcomputers, Software , Data and Communications by learning to use and program the ESP32 type Microcomputer. It will not assume any previous knowledge or experience other than basic computer operations. (There is a separate ARDUINO course).
This is a cooperative development effort between Terry King (currently USA), Jun Peng (China), Elden Montagne (Guyana), Char Wangkor (Egypt, South Sudan) , Glenn Mason (Connecticut USA) , Hudson Lusk (Connecticut USA), and with help and discussion from many others
THIS Wiki page as of now is just a working Info document for those of us designing and critiquing this approach. It is NOT (YET) useable Courseware ! We'll see how it actually develops.
We will use much of the approach we were recently working on in this Wiki: SEE HERE
These pages will have a more beginner-student approach and will separate out the “Learning Electronics” part.
The idea of this course / kit is to have students take one step at a time.
- Starting with ESP32 as a base: Use the "ESP32_PLUS_Development_Board" for their first learning experience. It has 3-pin connectors for all pins to connect to them. Studenst will:
- Learn what the parts DO.
- Combine multiple parts and demonstrate interesting projects.
- Learn many new concepts.
- Learn some other individual devices that are separate parts. Connect them and make them work. (Most of these will be available as "Electronic Bricks" that have 3-pin connectors). .
WHY ARE WE DOING THIS?
Over several years and continents we have designed and used and made several kits for use by students to learn "Arduino and sensors and actuators". The content may be good, but the whole thing comes into focus when a teacher has 10+ students with kits on their desk and they start trying to connect things up. Soon 3 kids at once are saying "It Doesn't WORK!"..
The original Arduino had two rows of female sockets that users had to plug wires and things into. Fussy Fussy. Creating an Arduino version with 3-pin connectors on every I/O pin helped a lot. Then getting sensors and actuators that were mounted on little PC boards ("Electronic Bricks") and 3-pin cables was a LOT better. And that is a good environment when students have learned quite a bit and start making their own projects.
But the very first student encounter with an Arduino/ESP32 and wires and connections, and software they have not used before and concepts they have not encountered before is a Difficult Moment! The teacher may encounter multiple simultaneous Difficult Moments.
ONLINE Students and CLASSROOM Students
This page will support both:
- ONLINE students who will do this independently and use ALL the information on this page
- CLASSROOM students whose teacher will present and discuss many of the concepts here
A series of printable PDF pages will extracted especially for classroom use.
There MAY be some PDF printable POSTERS for optional use on the wall etc.
ESP32 PLUS Board
This board has the Arduino shape and pins PLUS 3-pin connections for all I/O and built-in ESP32. It looks like this:
We are working on defining a kit will include many small electronics parts. They include SENSORS (Which detect physical things like light, heat, touch, motion etc. and also ACTUATORS that produce some action like turning on light or heat or motion. The kit will probably include a motor driver and two geared electric motors with wheels, to support building a “Smart Car”.. often referred to as a “Robot”..
The ESP32 has both Bluetooth and Wifi built in. So it can connect to smartphones and networks and browsers on phones or computers. The "Internet Of THINGS".
ALL AUTOMATED SYSTEMS are like this
Here is how we will THINK about ESP32. There are three main things that are part of all automatic systems:
[Sensor Inputs | Software Decisions | Action Outputs]
All automatic systems, from a simple thermostat to the Mars Rover have those 3 parts.
We can make hundreds of things with this structure depending on what PARTS we use.
The STRUCTURE of an ESP32 SYSTEM
Let's take a look at this diagram that shows the structure or "architecture" of a microcomputer based system like ESP32 and Arduino.
This shows examples of the kinds of Digital Input devices you might use. And Digital Output devices.
It also shows examples of Analog Input devices and Analog Output devices.
AND it shows examples of devices that communicate with SIGNALS that are a sequence of Digital Ones and Zeros. They communicate Data with those signals.
WHAT is DIGITAL and ANALOG ?
- Digital Example: A regular light switch, which turns a light either fully on or fully off. There is nothing in between.
- Analog Example: A dimmable light knob, which lets brightness smoothly range from dim to bright, with endless possible values in between.
HARDWARE we will use:
The list below is based on the kit used at AlNahda in Egypt in 2025 and reworked for a Robotics Club.
The overall kit will include many small electronics parts. And will probably include a motor driver and two geared electric motors with wheels, to support building a “Smart Car”.. often referred to as a “Robot”..
The ESP32 has both Bluetooth and Wifi built in. So it can connect to smartphones and networks and browsers on phones or computers. The "Internet Of THINGS".
SENSORS AND ACTUATORS
SENSORS:
- Pushbuttons
- Rocker Switch
- Potentiometer
- Temperature Sensor: DS18B20
- Light sensor
- Ultrasonic Distance Sensor
- Joystick
- Motion Sensor
- IR Remote receiver
ACTUATORS:
- LEDs + 220 ohm resistors
- Traffic Light 3 LEDS
- Servomotor
- Stepper Motor ??
- LCD Display 2x16
- RGB LED
- BUZZER (??)
- OTHER:
- Crocodile Clip leads
- Breadboard
- Ribbon multicolor Cable
- Pin Strips
- 3-pin cable: both ends ??:
- 3-pin cable: Separate end ??
- Resistors: 10K, 1K, 220 ohms
- IR Remote handheld
- Plastic Box
- Label on box
SOFTWARE we will use:
LEARNING SOFTWARE AND DATA CONCEPTS AND CODING
The ESP32 we are using is usually programmed in the C++ computer language. A good way to begin programming concepts for students is to use a visual “Drag-and-Drop” system on a desktop/laptop computer. The SCRATCH program developed over years at MIT is a good example, and we will use a version of SCRATCH3 that includes great support for ESP32. It is called KIDSBLOCK.
First Try: BLINK!
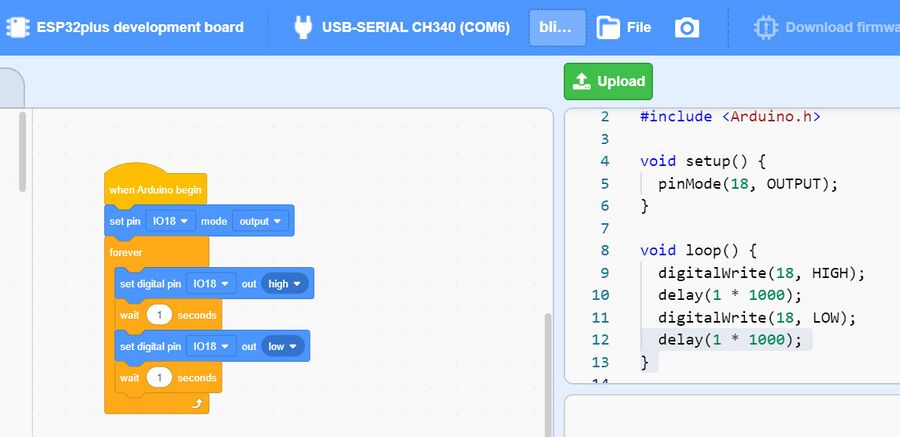
You will really do this a little later, but here's a quick look at a screen grab of KIDSBLOCK where the device that has been selected is the ESP32 PLUS development board. A wire has been connected from the Development Board IO Pin 18 to a RED LED on a "Traffic Light" module. You can see on the right the C++ text code that has been created from the blocks. The Green UPLOAD button has been clicked and after a lot of “Compile/Build Stuff” rolls by in the system window, the code is uploaded to the ESP32 and it WORKS! The Red LED goes ON for one secods and then goes OFF for one second, repeatedly.
There WILL be a section below with examples for the many different sensors and actuators in the kit. UNDER CONSTRUCTION 12/08/2025
WHAT's NEXT?
OK Lots more to work on here.
We need to create the courseware on the Wiki that students will encounter.
Thoughts On Courseware:
There are several things that were confusing about starting to use KIDSBLOCK. It starts up at default in SCRATCH graphics programming mode. That’s fine, and maybe we can USE that with kids starting out, even at younger than HS age. Hmmm..
There IS also a mode in which SCRATCH graphics with sprites and all that can Interact with Arduino or ESP32 so on-screen realtime SCRATCH sketches can interact with hardware. I have not tried that yet, although I understand how it download and uses “Firmata” code on the ESP32 to communicate from SCRATCH sprites etc. WOW, more ???
For ESP32 classes we need to have good How-To to get into the right mode, select the right board, and connect over USB. Here's what we're working on:
INSTALLING KIDSBLOCK
Go HERE to our page on Installing KIDSBLOCK. Then return here..
KIDSBLOCK SETUP AND USER OPTIONS
NOTES
Coming RealSoonNow :-) OK Terry is back on this part now :-)
There are several things that were confusing about starting to use KIDSBLOCK. It starts up at default in SCRATCH graphics programming mode. That’s fine, and maybe we can USE that with kids starting out, even at younger than HS age. Hmmm..
There IS also a mode in which SCRATCH graphics with sprites and all that can Interact with Arduino or ESP32 so on-screen realtime SCRATCH sketches can interact with hardware. I have not tried that yet, although I understand how it downloads and uses “Firmata” code on the ESP32 to communicate from SCRATCH sprites etc. WOW, more ???
For ESP32 classes we need to have good How-To to get into the right mode, select the right board, and connect over USB. Here's what we're working on: s.
TRY OUT KIDSBLOCK "SCRATCH" MODE
Click on the EVENTS button. Click and drag the (GREEN FLAG) item out to the right area and drop it.
Click on MOTION and drag the two blocks shown out to the right. Move them so they click together. Click on the Green Flag (The one UP to the LEFT of the LADYBUG). See the LADYBUG follow your code?? Try other things!
There are Many Examples on the "Tutorials" button on the top banner right
Instructors who are working with beginners may want to have a whole section they do here about the concepts of Computer Science and write code that DOES things.
SWITCH TO KIDSBLOCK ESP32 MODE
When Kidsblock starts up, on its top bar you will see this, which is default mode.
You need to select the DEVICE you want: ("ESP32 Development Board".. ) Here's how to find it:
Click on N0 Device Selected and you will see this page pop up:
The
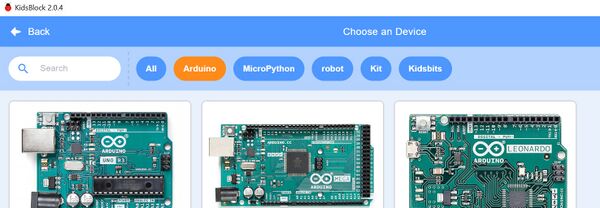
You need to select the DEVICE you want. "ESP32 Development Board" will be found in the ARDUINO option. That page will look like this:
Scroll DOWN and Click on the "ESP32 Development Board". NOTE: The outline of the board will change and then you click it to select.
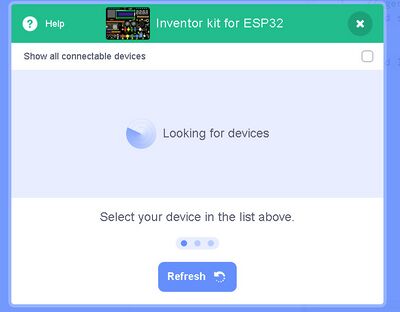
This will pop up another page which will try to FIND the ESP32 Development Board connected to your computer.
Now go ahead to plugging in your ESP32 PLUS.
GETTING THE ESP32 PLUS Development Board CONNECTED
Connect your "ESP32 PLUS Development Board" by USB cable ("USB-C"). A small LED should light up.
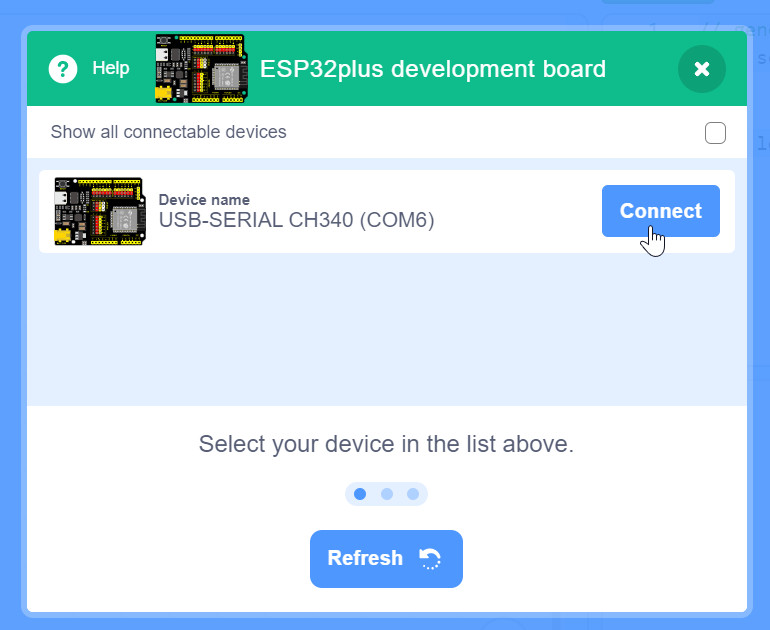
If the cable is correct and the Kidsblock install worked correctly so USB drivers were installed, the Kidsblock popup should change to this: (click on CONNECT)
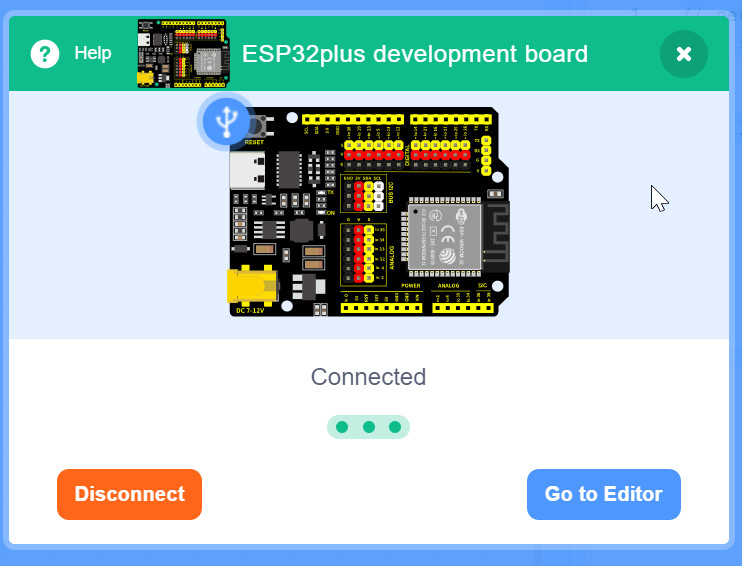
Next you should see this: (Click on "Go To Editor" )
NOTE: AT the Top Bar of Kidsblock you should see this as the PLUS Development Board is successfully connected. YOUR COM Port number will likely be different.

NOW you're ready to really use KIDSBLOCK to make things happen!
USING KIDSBLOCK TO LEARN ESP32 CODING
KIDSBLOCK FOR ESP32 CODING
WE assume you have followed the installation page linked above.
LOOK AT ALL THE KIDSBLOCK SECTIONS
Look over this example of the Kidsblock Screen and interfaces. Click on image for larger view. (X to get back)
KIDSBLOCK EXAMPLES FOR THE ESP32 PLUS Development Board
*******************************************
THIS AREA UNDERCONSTRUCTION DECEMBER 2025. Terry and Char ARE WORKING HERE
The kit we are working on includes many Sensors and Actuators we will use, as well as Bluetooth and Wifi Communications. Here’s a look at the parts we can connect to on the kit if you have not already gone over them..
PAGE ABOVE WITH PARTS LIST (click)
CONNECT the Traffic Light with Multiple LEDs
We will start with the first thing on our parts list:
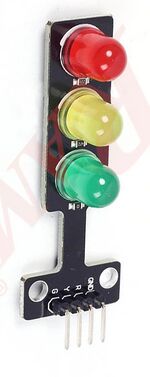
- Traffic Light 3 LEDS This has 4 connections: Red Yellow Green and Ground. Fortunately the 4 pins can plug directly into the ESP32 board!
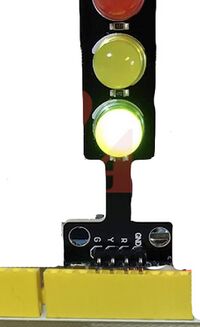
The traffic light module looks like this:
It has 3 LEDS. Each has a current-limiting resistor.
So it's ready to be directly connected to the ESP32 board connector.
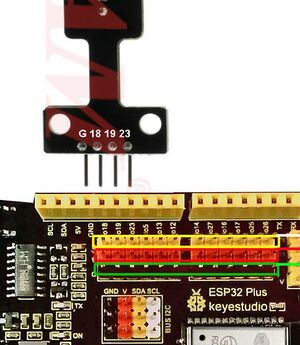
If we plug it in carefully! we will have:
GND
IO pin 18 to RED
IO Pin 19 to YELLOW
IO Pin 23 to GREEN
Carefully Plug in TrafficLight
Look very closely at the traffic light and the pins on it..
Here we are looking at it from the back.
The "G" [pin goes in the "fourth hole from the left "
And from the outside it looks like this:
Now let's program it!
EXAMPLE: Blink one LED
We will have the ESP32 turn the electrical PIN Number IO18 to ON and to OFF.
Start up KIDSBLOCK
We assume this is the first time you have used KIDSBLOCK for ESP32 or ARDUINO. Look over the Kidsblock Interface diagram above..
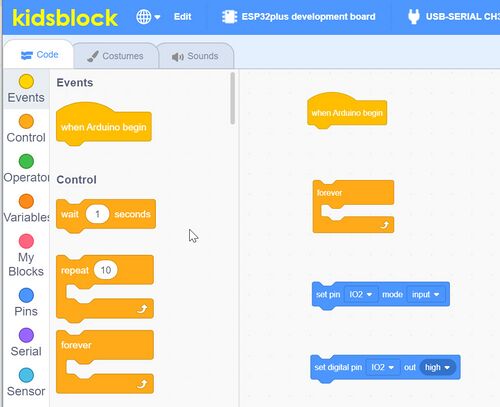
We will use the EVENTS, CONTROL and PINS Blocks. Look down the left most list of blocks. Click on some to see the actions that pop out for each block.
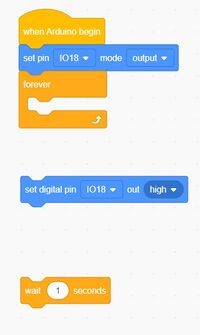
- Now click on EVENTS. Pull When Arduino Begin over into the Code Editing Area
- Now click on CONTROL. Pull forever over into the Code Editing Area
- Now click on PINS. Pull Set Pin and then Set Digital Pin over into the Code Editing Area
Like This:
Try out moving things around. (Grab them on their upper left corner).
Move the Set Pin block up under the WhenArduinoBegin and let it click into place.
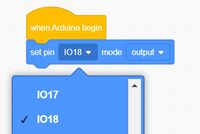
Now: Click on the little pulldowns and set IO18 and OUTPUT
now: Move Forever up until it clicks in place under set pin
Duplicating Blocks
Now click on CONTROL again . Pull wait 1 seconds over into the Code Editing Area
What we have should look like this. Use the pulldowns to fix 'set digital pin
We will want TWO of those 2 blocks.
We can Duplicate them! Right-Click on the SetDigitalPin block.
Click duplicate.. Move the two blocks so they are not touching.
Right-Click on the wait 1 seconds block.
Click duplicate. Move the two blocks so they are not touching.
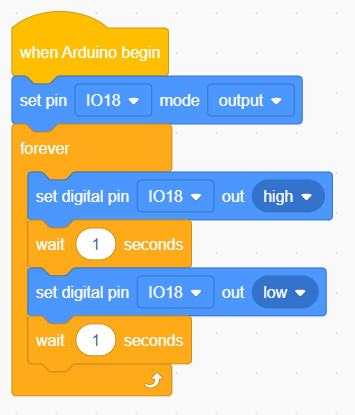
Move the blocks so they are arranged inside forever
Make Sure you check all the pulldowns as they are not the same!
It should look like this:
Now Make It WORK!
Check the top banner on KIDSBLOCK. You should see:

If you see UNConnected go back and check your ESP32 and USB cable. Maybe unplug and replug it. Click on the "Unconnected" and try again.
Now: Up right find the UPLOAD button and click it..
Next this screen will come up:
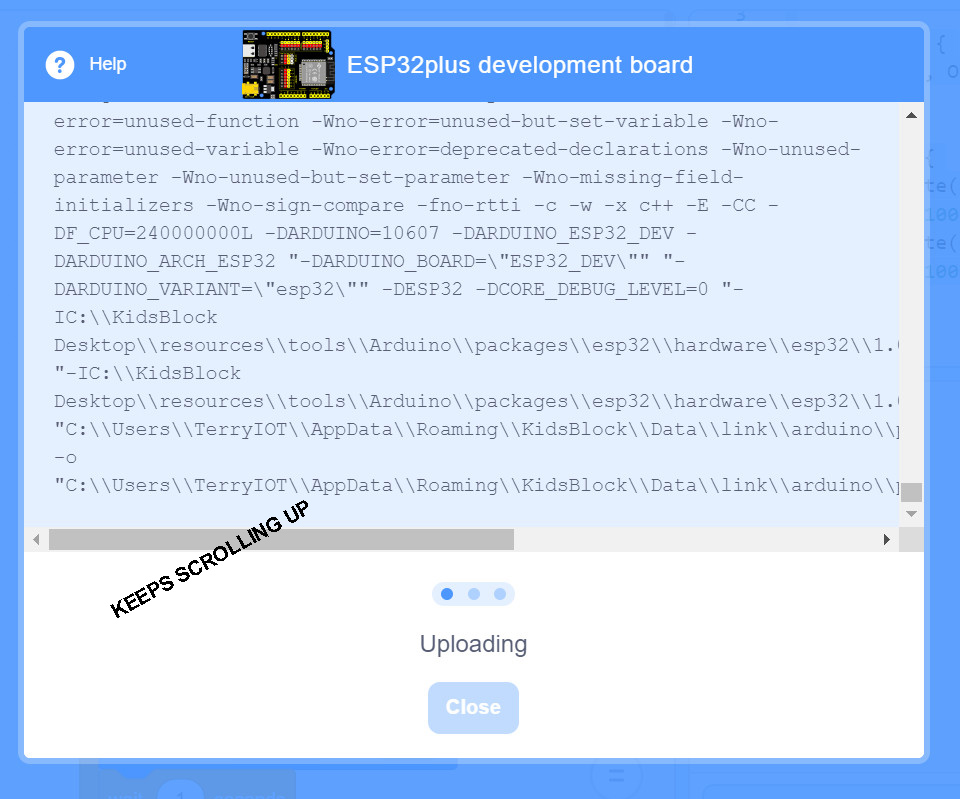
And then these messages will come into the lower part of that screen:
NOTE: There will be Long Delays in between these screens. Just watch and wait.
 ]
]
And then this screen will run and you will see it writing your software into the ESP32
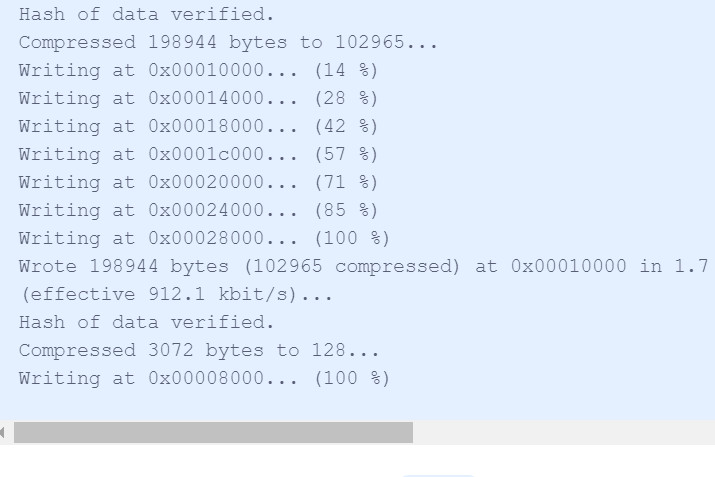
When that finishes it will go back to your Kidsblock screen and at the upper right you should see:
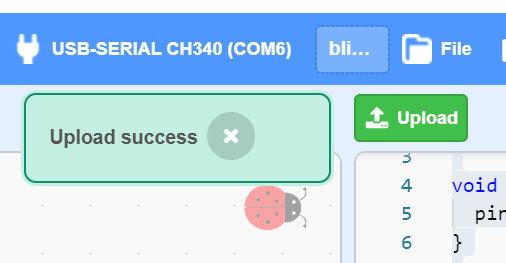
And THEN yourcode will start running and you shold see the ESP32 take the actions you told it to do.
In this case you told it to turn IO18 ON and OFF. That's the RED LED on the traffic light.
CHALLENGE: Now blink all 3 Traffic Light LEDs one after another. RED-YELLOW-GREEN
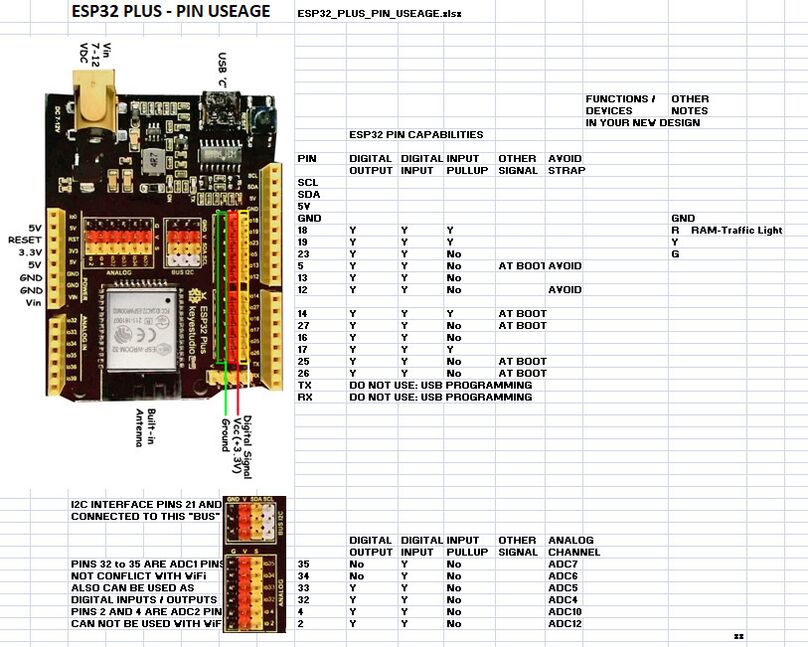
ESP32_PLUS_Development_Board RECOMMENDED PIN USEAGE
The following table shows what pins are best to use as inputs or outputs and which ones you need to be cautious of because they have other uses or actions. The pins labelled OK are OK to use for digital Input or Output, and for the other functions they are labelled for such as PWM, Analog In or Out etc.
There is a PDF file available with this diagram and columns for you to note what your project will be using pins for.
You can "right click" and then "Save link as".
It's Media:ESP32 PLUS PIN USEAGE.pdf HERE

